I recently participated in Matt Parker’s challenge to crowd-source proofs that all of the unfoldings of a 4D hypercube tile 3D space. I’m putting the proofs I submitted here in case the WHUTS site ever disappears. Be sure to check out the original youtube video on this subject: https://youtu.be/Yq3P-LhlcQo
Originally posted to https://whuts.org/unfolding/234
3D model for this tiling: 234.FCStd
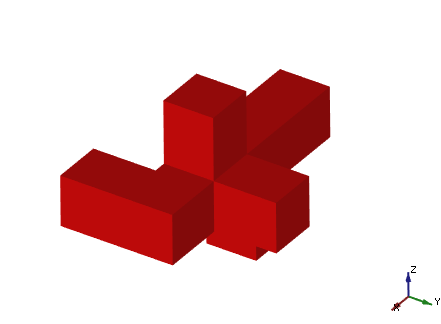
Define an unfolded volume to reside in 3D space as shown. Note the axis.

Pieces nest without interference if duplicated with an offset vector of <-1,-1,1>

Pieces also stack with no collisions if copied and translated by <2,2,0>

Offset copies translated <4,0,0> also do not collide. Note that the 3 translation vectors we have used can be reduced to the standard basis vectors for the R3 space.

By confirming visually that larger tilings work without collision, we can be confident that this unfolding will tile 3D space.

Clipped view of a large tiled group.
Originally posted to https://whuts.org/unfolding/258
3D model for this tiling: 258.FCStd

This unfolding caught my eye because it is made up of one Z and one S tetromino. If we lay the z side on a flat surface, The S pieces stick up, and a “2.5D” tiling can be made. I used a set of 3 pieces as a basic group.

The 3 Part group can be arranged adjacent to itself to create a “mat” of unfoldings that could cover an infinite flat surface.

Top view of the “mat” structure. Notice that the Z pieces are confined to the first layer. Meanwhile, the second and third layers are occupied by S pieces and holes that look like they would fit S pieces rather nicely.

The final step is to flip a copy of the built up group upside down and stack it on itself. We now have a 4 unit thick structure that tiles horizontally and can be stacked vertically.

A larger tiled block. I modelled the unfolding in FreeCAD and used linked parts to arrange copies.

Using a clipping plane to confirm that no pieces intersect.